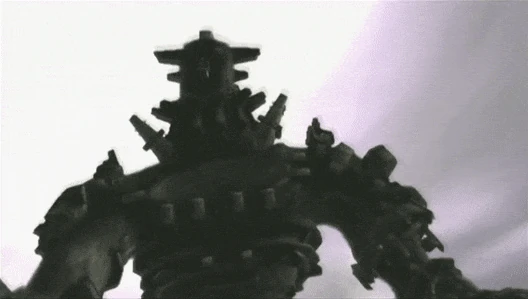
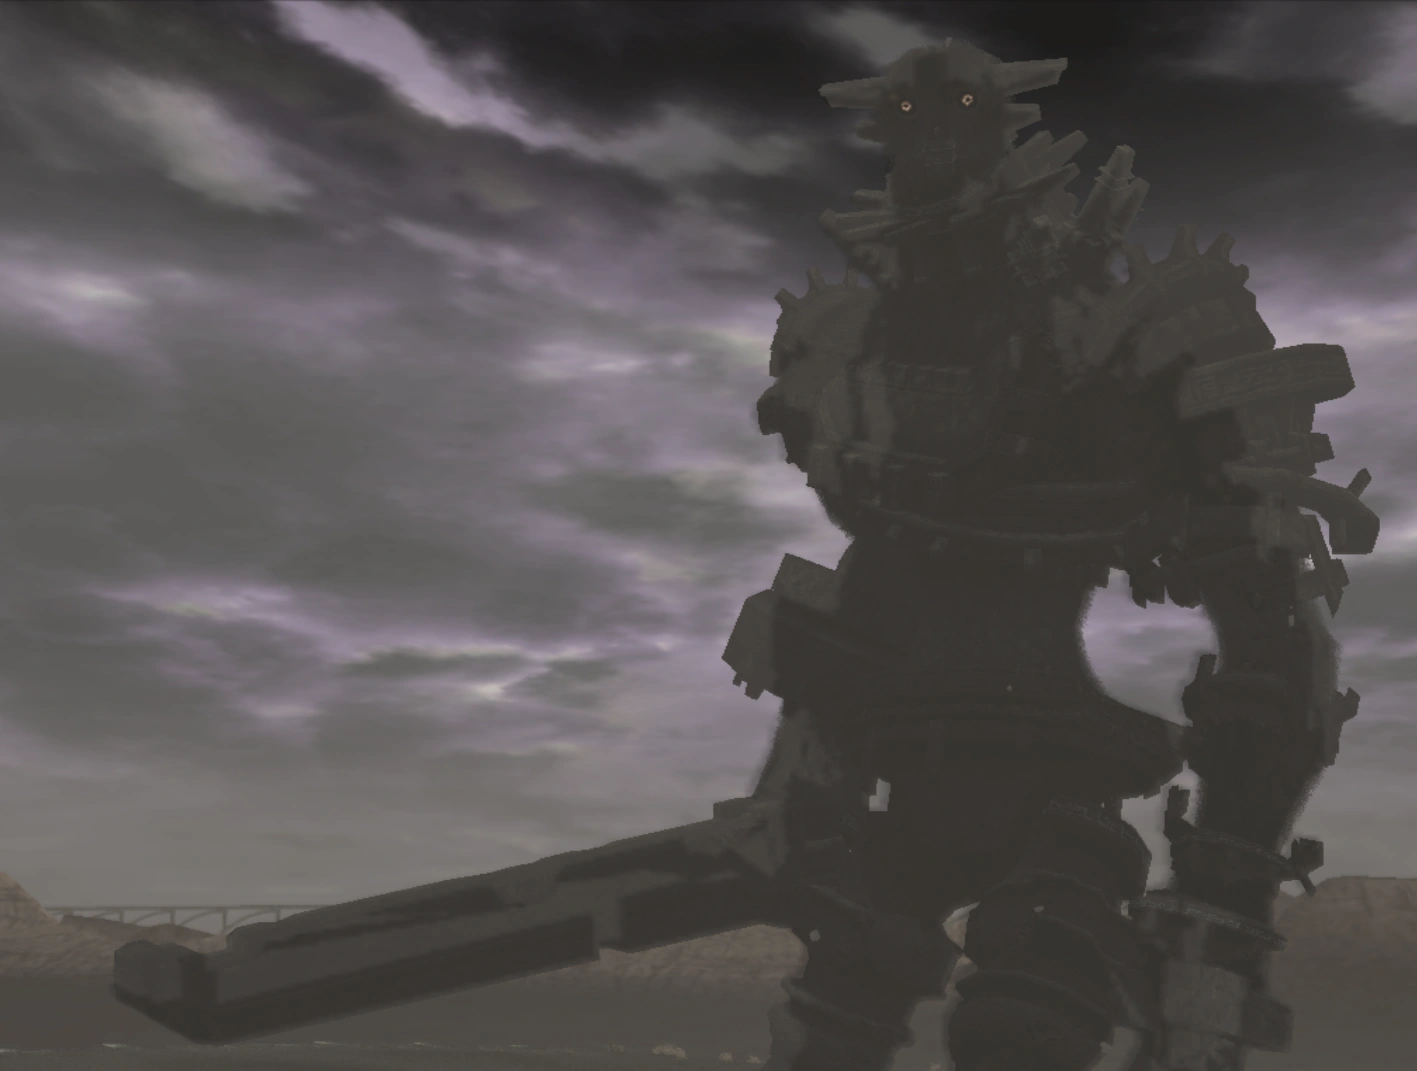
The 3rd Colossus, resembling a knight, is one of sixteen bosses fought in Shadow of the Colossus. Its lair is a tilted arena in the middle of a giant lake in quadrant E2.
Path to the colossus
- See also: Map for this path
Initially, the path to the 3rd colossus is the same as the path taken before for the 2nd - go around the Shrine of Worship to the right until being presented a way north, then proceed across the land bridge. This time, however, go left when the path forks; this will take the player to the northern plains. The sword will direct Wander to the northwest now. It will point roughly to a ravine entrance; this is where to go. The ravine path will eventually lead to the shores of a lake, and a cutscene will start, emphasizing the giant island in the middle of the lake and a path to take to go up. Wander must leave Agro behind here. Jump into the lake and swim to the path on the west side of the arena. This pathway will eventually end, and the player must jump to a ledge on an adjacent pillar. Grab on and go to the right. Here, Wander must leap off this ledge to reach the arena, just like what was required to reach the 1st colossus. Though the lake is a very long way down, Wander won't die if the maneuver is performed incorrectly, but it does takes a while to swim back. Once having jumped successfully, climb up to the top of the arena to begin.
Walkthrough
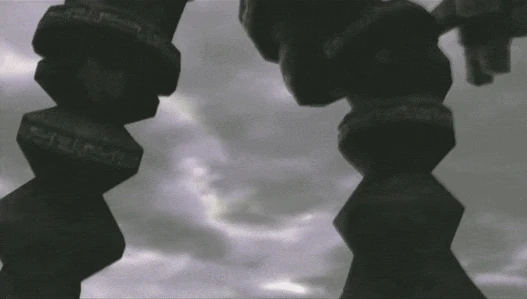
The colossus will often attack Wander with its "sword" - a massive pillar of rock in place of a right hand - by swinging it and bringing it down to the earth with a massive crash. The obvious thing to do here is to run up the sword to start the ascent towards its major sigils, but there is a complication to this strategy: after running all the way up the sword, the way up is blocked by a great band of stone around the colossus' right wrist. To proceed, the barrier must be shattered.
In the center of the arena, there is a peculiar, shimmering plate. Prompt the colossus to swing its sword down upon this plate; once it brings its weapon down on the solid plate, the force of the impact will shatter the guard around its wrist. After this happens, it will almost always perform the sword attack again; make sure Wander is not on the plate this time, as the sword will simply crash off of it. Note that if Wander is too close to the colossus, it will preform a stabbing action into the ground versus an overhead swing; it must do the latter to run up the sword so Wander can start climbing. The player may wish to get the weakpoint on its midsection before the one on the head, though it can be a trickier jump than it looks.
- Time Attack times in Original and PS3 versions (Normal, Hard): 6:00, 5:00
- Time Attack times in PS4 Remake (Normal, Hard): 6:00, 6:30
Weakspots
| Location | Percentage of health | |
|---|---|---|
| Normal | Hard | |
| On its midsection | 50% | 33.3% |
| On top of its head | 50% | 33.3% |
| On the back of its left arm | N/A | 33.3% |
Tips and tricks
- When the colossus pulls its sword out of the ground, skilled or lucky players can launch high into the air if they crouch down near the end of the sword at the right time. By doing this, Wander can land on the colossus' upper body and reach the major sigils without having to shatter its armor. This is a great time saver and very useful for those who have trouble with Time Attack.
- Players of the PS4 remake will want to try a different method for the sword launch, as the original crouching method isn't as effective as it used to be.
- If one has trouble executing the sword jump method properly, there is an alternative. When the colossus is holding its sword normally (with Wander on it), it will slowly move its arm up and down in an attempt to dislodge him. With the correct timing, Wander can jump at the moment the sword moves up in such a way that he'll land above its armor on its arm.
- Another alternative to consider is to jump onto its thigh and then jump above the wristguard as it lowers its arm.
- After taking out the weakpoint on the colossus' abdomen, it is possible to jump directly from its waist to its left arm, as there is an extra major sigil there on Hard Mode. It is fairly simple to get just right, and it is a real time saver. Also, if one manages to quickly take out the sigil on its arm, Wander can swiftly leap up to its shoulder and regain stamina before taking out the sigil on its head. This is also a time saver.
- Right on the colossus' left shoulder (directly above the extra sigil on Hard Mode), there is a small ledge that, if used correctly, can be a rapid and effective way of regaining stamina. It is difficult to use, as even the slightest of its movements will cause Wander to grab the edge of the ledge and not regain stamina, but it is extremely helpful otherwise.
- When attempting to approach the colossus' weakspots on its left arm and head, Wander can camp momentarily on its right arm until it will attempt to bend down to shake Wander. While it is bending down, both weakspots are exposed to a high amount of stabs, and the major sigil on its arm is easier to access as Wander can now simply run for the sigil instead of having to climb downwards to reach it.
Attacks
| Attack | Damage (Normal) | Damage (Hard) | Description | Demonstration |
|---|---|---|---|---|
| Weapon Strike | 20 (Shockwave) 40 (Direct hit) |
40 (Shockwave) Instakill (Direct hit) |
The colossus will swing its club at the player if they're far enough away from it. If the player is on soil its sword will be stuck in it for a few seconds; if the player is on the metal platform at the center however, it will bounce. Get away from its reach as much as possible. | 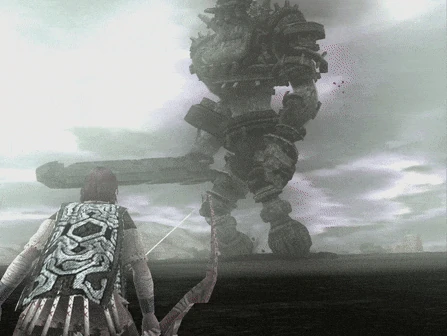
|
| Weapon Thrust | 20 (Shockwave) 40 (Direct hit) |
40 (Shockwave) Instakill (Direct hit) |
At a medium distance, the colossus will thrust its sword downwards into the ground, creating a huge shockwave. Just like the previous attack, it will bounce if it hits the metal platform. As soon as it begins lifting its sword, go further back. | 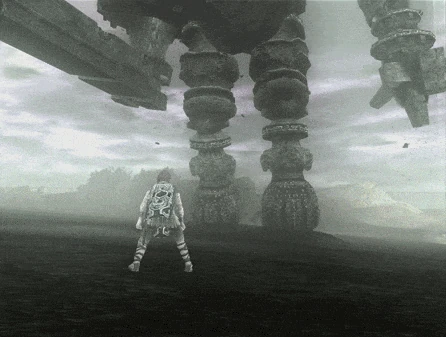
|
| Stomp | 20 (Shockwave) 35 (Direct hit) |
40 (Shockwave) Instakill (Direct hit) |
If Wander stands near its feet, it will lift either its left or right leg depending on the player's location. The attack is easily avoidable. | 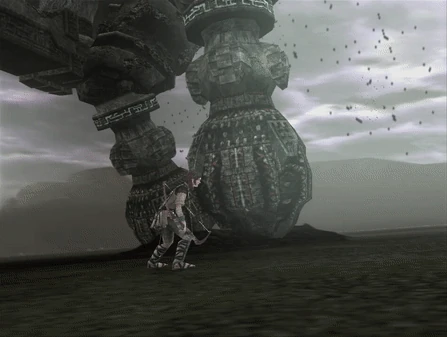
|
Music
| Phase | Plays in | Music |
|---|---|---|
| Intro | Plays when Wander arrives at the shore. | Lakeside |
| Phase 1 | Plays once the colossus first sees Wander. | In Awe of the Power |
| Phase 2 | Plays after the colossus' armor shatters. | The Opened Way |
Development History
This colossus was created at the start of the game's development in early 2003, and it used to be tested in Stage 6 before being placed on the world map. Its nickname during development was 'Knight'.[1]
Knight
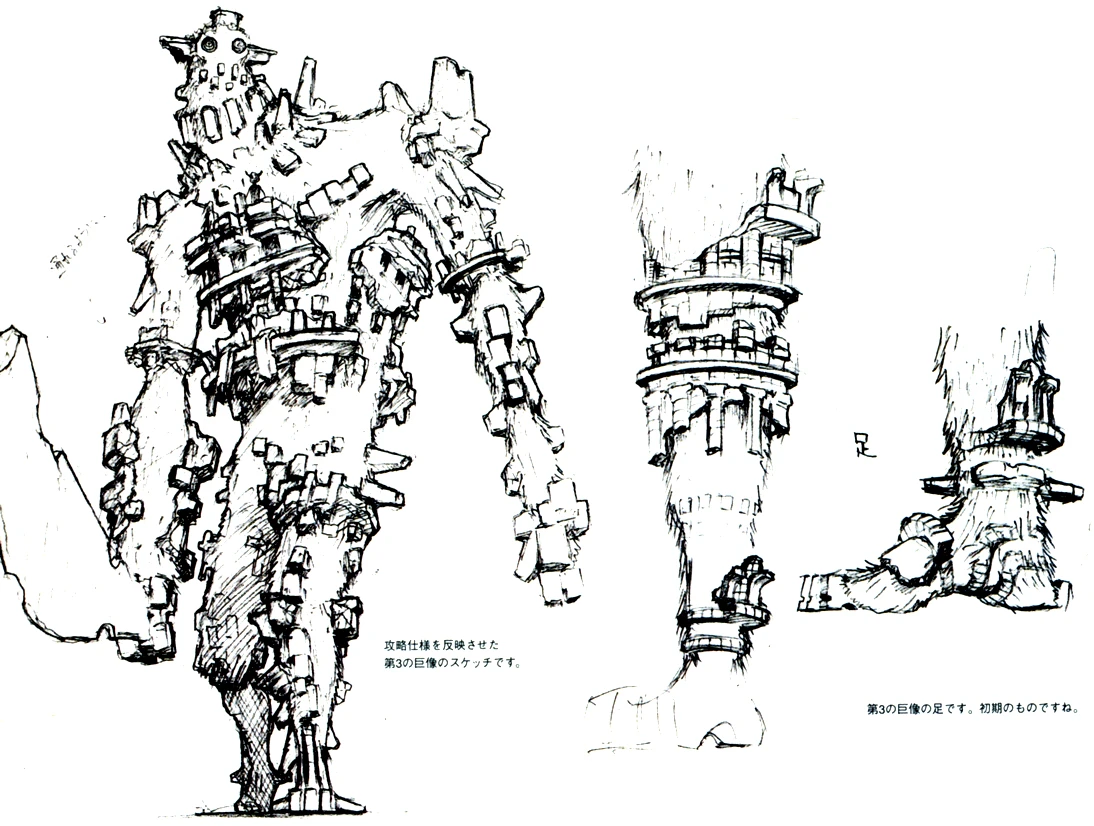
Sketch of Knight taken from the official artbook.
The first iteration of Knight was never shown. However, concept art of it exists, with it being very similar to its later appearance. During its time being tested in Stage 6, it likely had a tower of some sort, as a script named ">ST06A_TOWER_DAMAGE<" was found in the PS3 Data Sheets. This may related to two objects called "Tower_A" and "Tower_B". Both use "sz_moyou" textures which are used primarily on the colossus' model suggesting they were related. Both towers were also split into many parts meaning they were likely very large and could be destroyed, possibly by the colossus. It is unknown how the towers were used in the fight.
Knight in the first seamless map.
At the start of 2004, Knight was placed on the first seamless world map, which was completely flat except for the copied and pasted cliffs from the 'parts library'. As its arena wasn't finished yet, it was placed on a flat plain similar to most quadrants at the time, with the exception of having six platforms around the area to test its strategy. At first, the colossus would have to step on the platforms to break its neck armor, in addition to making it hit them to break its arm guard.[1]
Unused sweeping attack.
This version of Knight had a more traditional-looking sword, instead of the club of its later incarnation. It had the ability to perform a sweeping attack with it, which was likely removed due to its later arena being tilted, possibly causing collision issues.
The HUD icon of Knight.
As seen in early footage and listed in the data sheets, Knight had a unique HUD icon, which is an icon in the shape of the colossus that used to show the weakpoint locations in early builds.
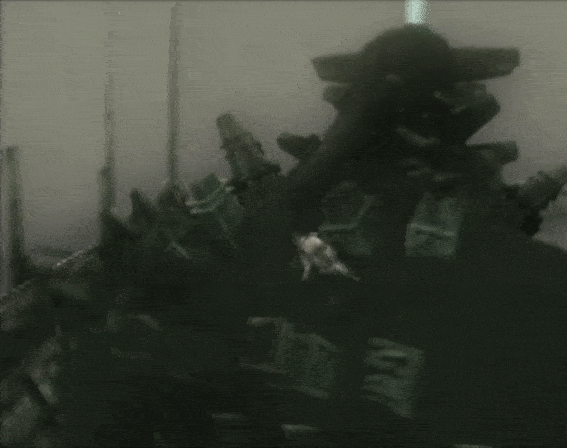
On top of Knight. Note the metallic plates placed on the arena. Broken pieces of its armor can also be seen on the ground.
Later in 2004, when the proper world map was being created by using a 2D height map, Knight was placed in its proper arena in quadrant E2, where it stayed until the end of development. Its arena featured long and thin spirals placed around it, and had several metallic plates placed throughout the ground, before it had a platform in the center. The arena also only had one entrance going up to it, instead of two like in later versions.
The boss_zou entry in the BossStatus data sheet from the E3 Demo suggests that Knight used to be the 7th colossus at some point in development around the 2004 era.
E3 Demo
- Main article: Shadow of the Colossus (E3 Demo)#VI
Knight in E3.
In the version of the game from May 11th 2005 (known as the E3 Demo), Knight, now the 6th colossus, had some differences.

The colossus' shake animation in the E3 Demo.
The colossus had a few small differences in its chest armor, and its shaking animation was wildly different. The theme 'Grotesque Figures' played for its battle. The lighting of the arena was also a lot darker.
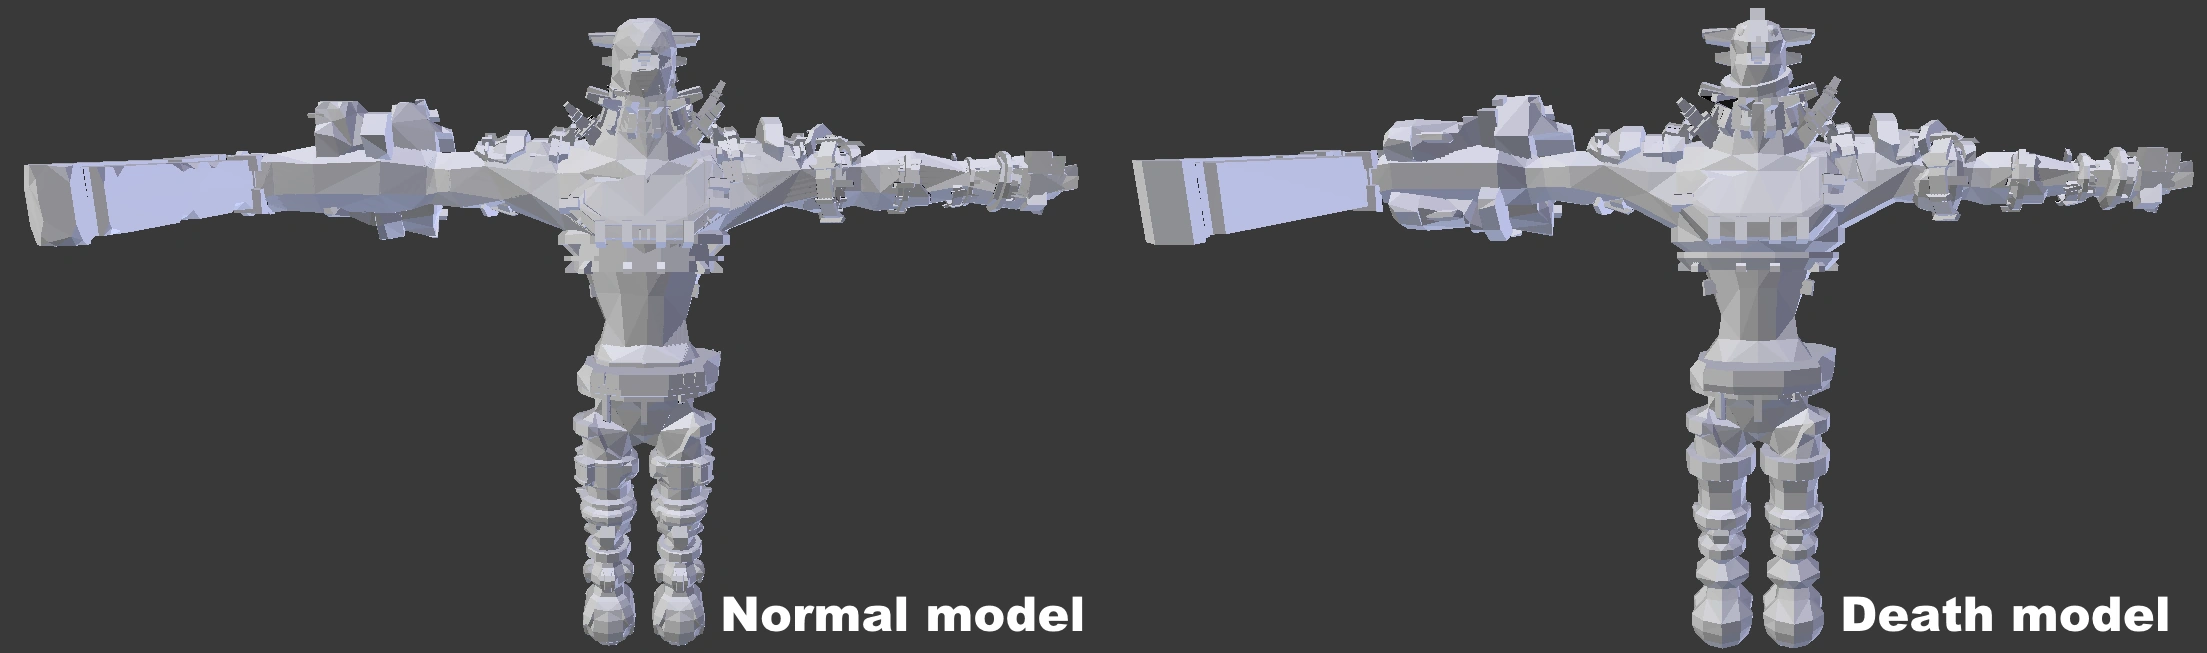
Death model of Knight from the E3 Demo compared to its actual model. It shows its earlier incarnation.
The death model of Knight had additional pieces on its back and at the top of its head, just like the earlier design of it when it still had the stone eyes.
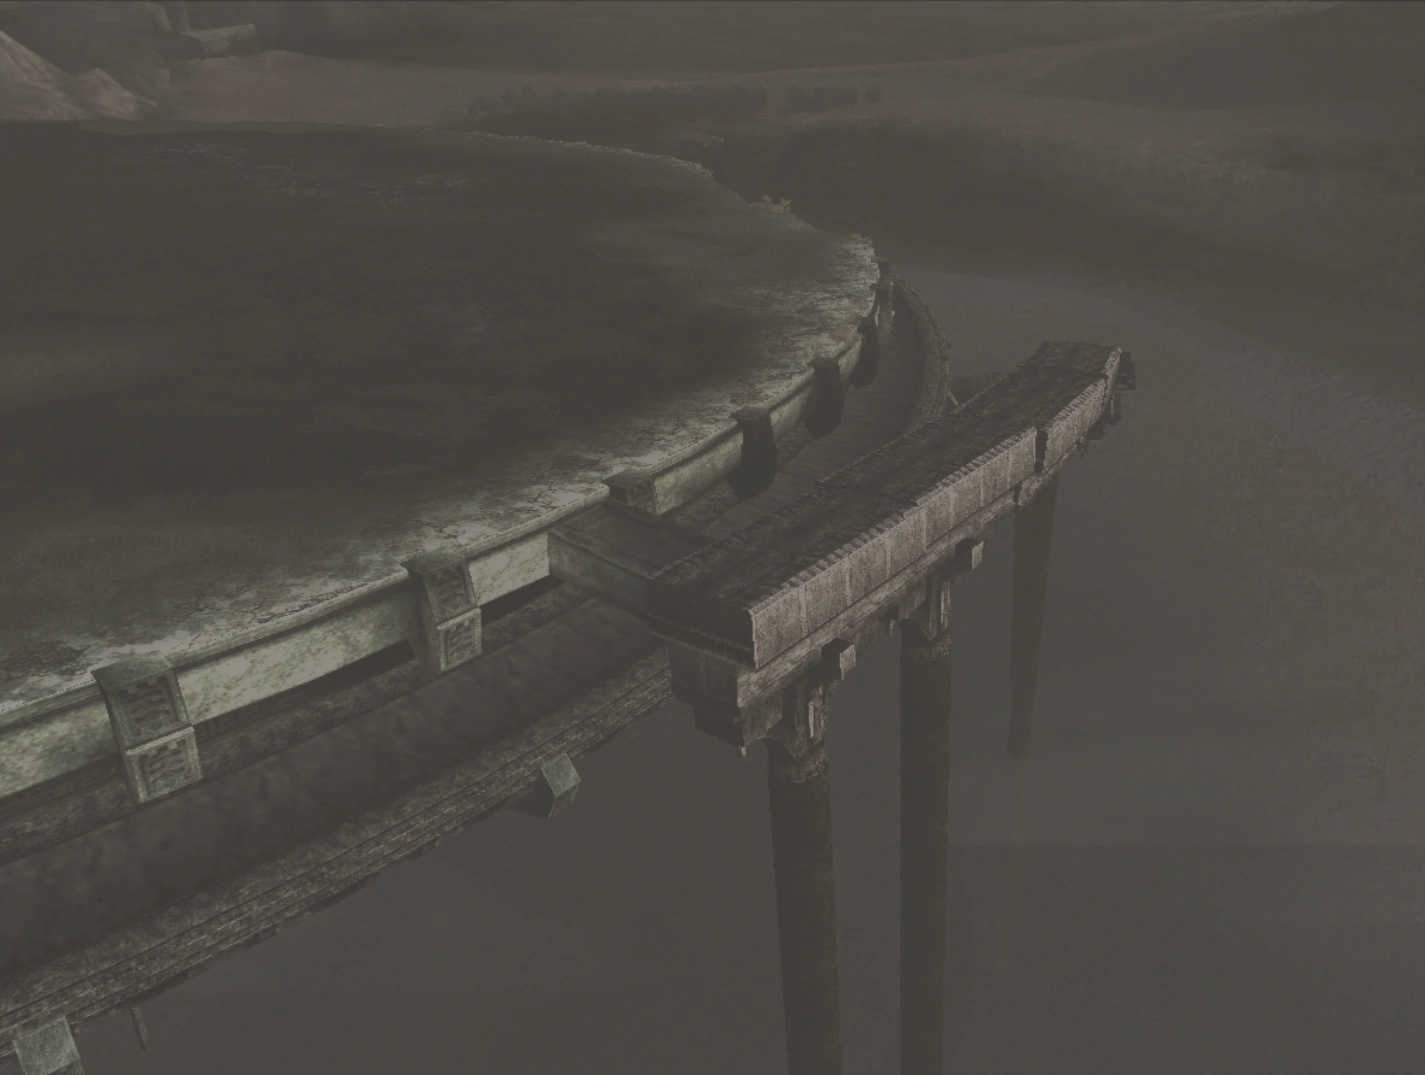
The bridge from the E3 Demo.
The end of the bridge leading up to the Arena was not broken, and used to connect to the top without the need for jumping. Also, the platform in the center had a mirror-like property to it.
Arena already had its introduction cutscene, but it could only be played if the player was coming 'D2'. The camera also went through some walls of the area, likely because it's still the same cutscene from the early version of the location.
Upon release, all of the above was changed, and the boss became the 3rd colossus.
Trivia
- This is one of only three colossi that wield a weapon, the other two being the 1st and 15th colossi. The 3rd colossus is also the only one of these three that will never drop its weapon; the 1st colossus drops its weapon during its death sequence, and the 15th is disarmed by Wander during their battle. This is likely due to the fact that the 3rd colossus' weapon is either physically a part of its body or grafted onto its right hand; either way, it appears to be permanently attached to it.
- The 3rd colossus has the farthest reach of any colossi (excluding the four that use projectile attacks) due to both its height and the length of its sword.
- Unlike the majority of colossi, this colossus' appearance isn't animalistic; it somewhat resembles a human in proportion and stature.
- This colossus makes an appearance on the Playstation 4 remaster cover art, alongside Wander near him.
- The 3rd colossus makes a lot of different noises; as with most colossi, it bellows and roars a lot, and some of the noises it makes are similar to those made by roaring bears.
- This is potentially the furriest of all 16 colossi; most of its body that isn't covered by armor has fur on it, and even when the armor on its arm is broken, it can be seen that beneath that armor is more fur. Going by this, it is possible that most of its body is covered in fur, rather than in specific places like the other colossi. There is, however, a bald patch of tough skin on the inside of its right arm.
- This is the only bipedal colossus that doesn't have hands. Its right hand is connected directly to its sword, and its left is like a stump with some stone armor protruding from it, which vaguely resembles very crude fingers.
- This and the 1st colossi are the only two colossi with major sigils on their arms, but those are exclusive to Hard Mode. The 15th and 16th come close, but they have minor sigils on their arms, not major.
- Along with the 2nd colossus and Wander, the 3rd colossus made a cameo appearance outside of Shadow of the Colossus in the 2008 PS3 game LittleBigPlanet, where it can be downloaded as a costume.
- In the PS4 Remaster, a trophy can be earned from defeating the 3rd colossus without shattering its wristguard.
- This is the third-tallest colossus after the 16th and 2nd colossi.
- The 3rd colossus has been referenced in the PS5 videogame "Astro's Playroom", as a giant robot walking in the background.
Gallery
Original
")
")
")
")
")
")
")
")
")
")
")
")
Remake
")
")
")
")
")
")
")
")
")
")
Earlier versions
")
")
")
")
")
")
")
")
")
")
")
")
")
")
")
")
")
")
")
")
")
")
")
")
")
")
Other media
")
")
")
")
")
References
- ↑ 1.0 1.1 https://teamico.fandom.com/wiki/File:FamitsuNicknameInterview.png | December 2nd, 2005 Famitsu - The Colossi Nicknames (1st to 10th Colossus)
| The game | ICO ( Demo • Revisions from U.S. version • Ico HD ) | |
| Characters | Ico • Yorda • The Queen • Shadows • Shinkan | |
| The Castle | Altar • Warehouse • Spiral Stairs • Old Bridge • Stairs • Trolley 1 • Trolley 2 • Crane • Chandelier • Drawbridge • Main Gate • Graveyard • Dark Room • Windmill • Sunbeams • Stone Pillar • East Crag • East Arena • East Idol Stairs • East Reflector • Waterfall • Sluice • Cogwheel • Gondola • Water Tower • West Crag • West Arena • West Idol Stairs • West Reflector • Cage • Pipe • Elevator • Wharf • Queen's Room • Sandy Beach | |
| Items | Stick • Sword • Queen's Sword • Mace • Light Saber | |
| Miscellaneous | Idol Gates • Runic language • Sofas • ICO Stages | |
| Unused Content | Castle Soldiers • Unused Locations (Dynamite Room) • Unused Objects | |
| Other Media | Credits • Ico ~Melody in the Mist~ • Official Game Guide • Ico: Castle in the Mist • Development Timeline of ICO • Interview Archive | |
| The Game | gen ATLAS • Credits | |
| Characters | Protagonist • Robot Head | |
| Other Media | Interview Archive | |
 Walkthrough Walkthrough | |
|---|---|
| Characters | Wander · Mono · Agro · Dormin · Lord Emon · Guards · Shadows |
| Colossi | I · II · III · IV · V · VI · VII · VIII · IX · X · XI · XII · XIII · XIV · XV · XVI |
| Locations | The Ancient Lands · Shrine of Worship · Colossus Arenas |
| Main Items | Power-ups (Lizards · Fruit) · Weapons (Ancient Sword · Sword of the Sun · Queen’s Sword · Sword of Dormin · Bow & Arrow · Ancient Bow · Harpoon of Thunder · Life Sword) · Collectibles (Relics) |
| Gameplay | Hard Mode · Save shrines · Time Attack · Reminiscence Mode · Watermelon · Barrel |
| Media | Roar of the Earth (OST) · Official Art and Guide Book · Nico Bonus DVD · Film · Interview Archive |
| Releases | OPM Demo · PS2 original · PS3 remaster · PS4 remake · Credits |
| Early Builds | Preview version · PSU Preview version · E3 Demo |
| Unused Content | Unused Colossi · Colossus Test Stages · Unused Locations · Beta Mountains · Development Timeline of Shadow of the Colossus |